If you’ve ever opened a box of laminate flooring and stared at the plank edges trying to figure out which way is up, you’ve run into the tongue-and-groove question. It’s one of the most common points of confusion for first-time installers, and getting it backward on the first row can mean pulling up planks and starting over.
Quick Answer: The tongue side of laminate flooring is the edge with a thin, protruding ridge that’s designed to slide into the groove — a matching recessed slot — on the neighboring plank. This tongue-and-groove system is what allows laminate planks to click together into a tight, stable floating floor. During installation, the tongue side typically faces the starting wall, so the groove side of each subsequent plank locks onto the tongue of the one before it.
Here’s how to identify it, why the orientation matters, and how to avoid the most common installation mistake tied to it.
Tongue vs. Groove: What Each One Is
Every laminate plank has two edge types built into its design:
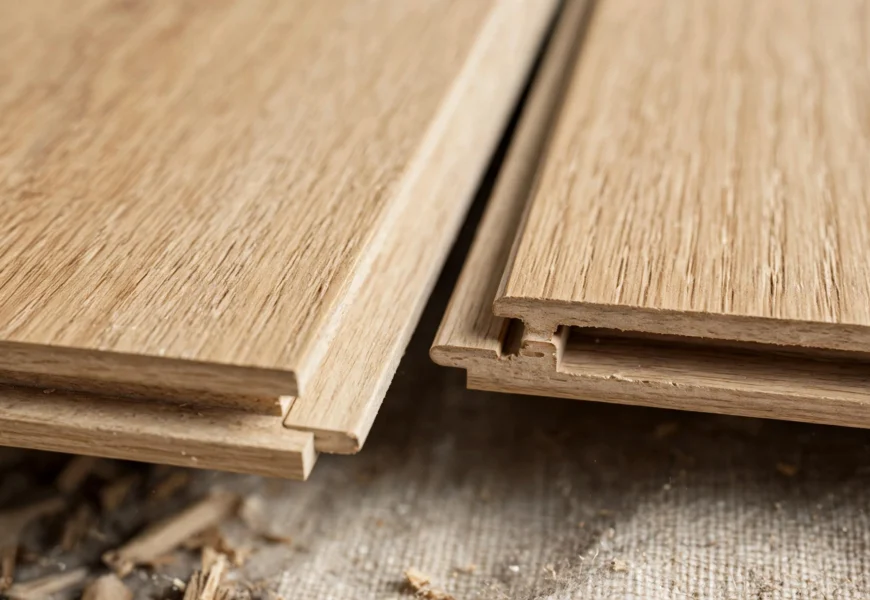
- Tongue — A thin, protruding ridge running along one long edge and typically one short edge of the plank. It sticks out slightly from the plank’s profile.
- Groove — A corresponding recessed slot on the opposite long edge and short edge, shaped to receive the tongue of the adjacent plank.
Together, they form what’s known as a tongue-and-groove (T&G) locking system, which lets laminate planks click together into a tight, nearly seamless floor without nails, staples, or glue — this is what makes laminate a “floating floor” that isn’t fixed to the subfloor underneath.
How to Identify the Tongue Side
If the plank’s profile isn’t obvious at a glance, the easiest way to check is by feel:
- Run your finger along one long edge of the plank — if you feel a thin ridge sticking out beyond the plank’s surface, that’s the tongue.
- Check the opposite long edge — you should feel a recessed slot instead. That’s the groove.
- Many laminate brands also print directional arrows or a small guide on the underside of the plank to make orientation easier, so check there first if you’re unsure.
In most laminate products, the tongue runs along the long side of the plank, though some product lines also include a tongue-and-groove profile on the short ends. Always double-check your specific product’s installation guide, since edge profiles can vary slightly by manufacturer.
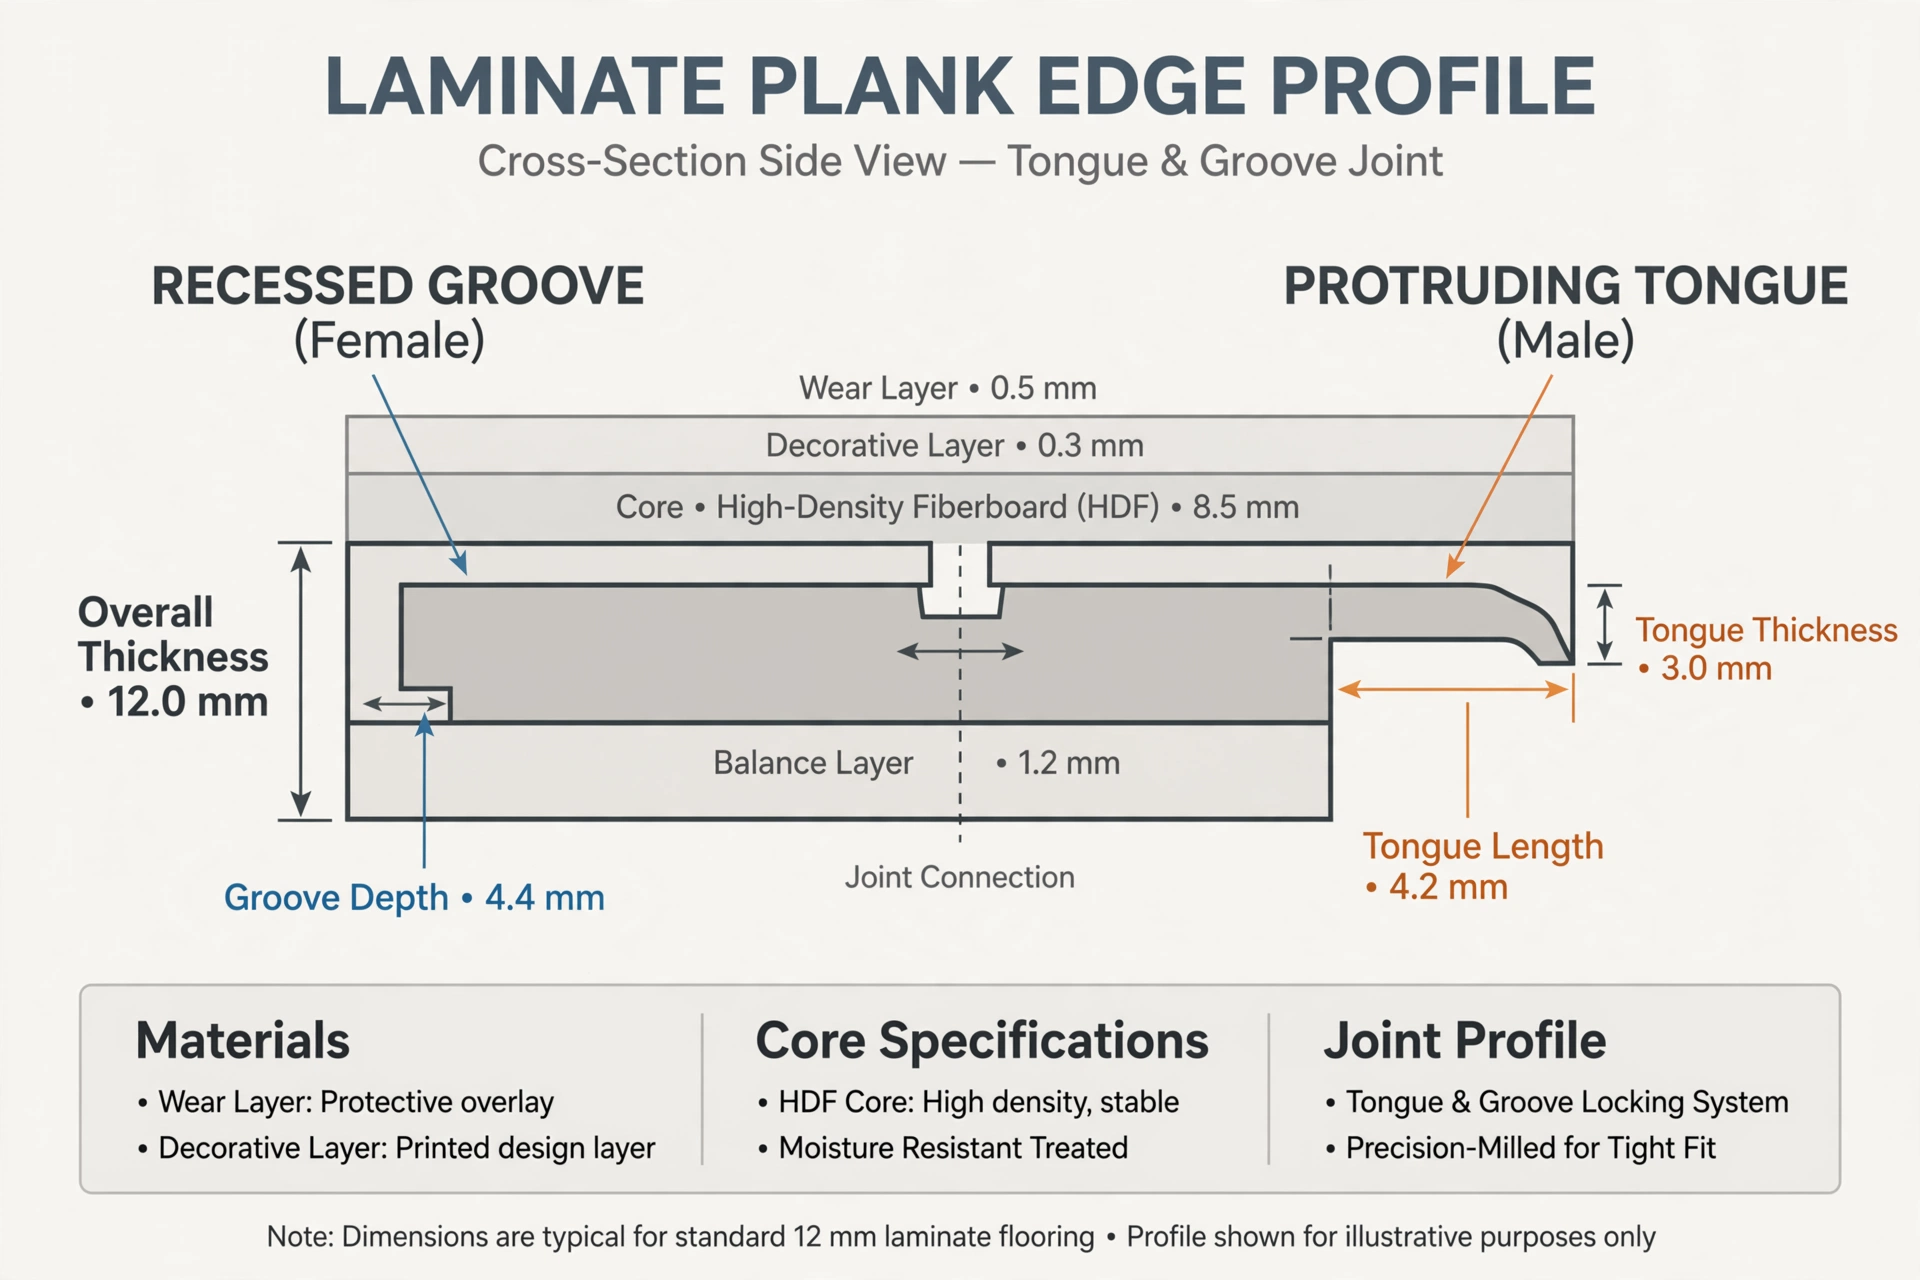
The tongue protrudes from one edge of the plank, while the groove is a matching recessed slot on the opposite edge.
Why the Tongue Side Matters During Installation
Getting the orientation right isn’t just a technical detail — it affects how the whole room comes together:
- Starting wall placement: Most installation guides recommend laying the first row with the tongue side facing the starting wall, so that each new plank’s groove locks onto the tongue of the row already in place, working outward across the room.
- Preventing damaged edges: Installing in the wrong direction, or working right-to-left instead of left-to-right, increases the risk of chipping or breaking the delicate tongue edge as you try to force pieces together.
- Avoiding rework: Starting from the wrong wall with the tongue facing outward instead of toward the wall is one of the most common beginner mistakes — and it usually means pulling up and reinstalling the entire first row once the error is noticed.
If you’re planning a full flooring swap and want to compare laminate against other options first, our guide on the difference between vinyl and laminate flooring covers how their locking systems and installation processes compare.
Step-by-Step: Installing With the Tongue Side in Mind
- Acclimate the planks to the room’s temperature and humidity for at least 48 hours before installation, which helps prevent warping after the floor is down.
- Prepare the subfloor, making sure it’s clean, dry, and level — an uneven subfloor can put extra stress on the tongue-and-groove joints over time.
- Add underlayment if your product requires it, for cushioning, sound absorption, and added moisture protection.
- Lay the first row with the tongue side facing the starting wall, using spacers to maintain a small expansion gap (typically around 1/4 inch) around the room’s perimeter.
- Work left to right, connecting the tongue edge of each new plank into the groove of the previous one, using a tapping block and rubber mallet to seat the joint without damaging the edge.
- Stagger the seams row to row for a more natural look and better structural stability.
- Measure carefully on the final row, since planks often need to be cut to fit, and the tongue or groove edge may need to be trimmed accordingly.
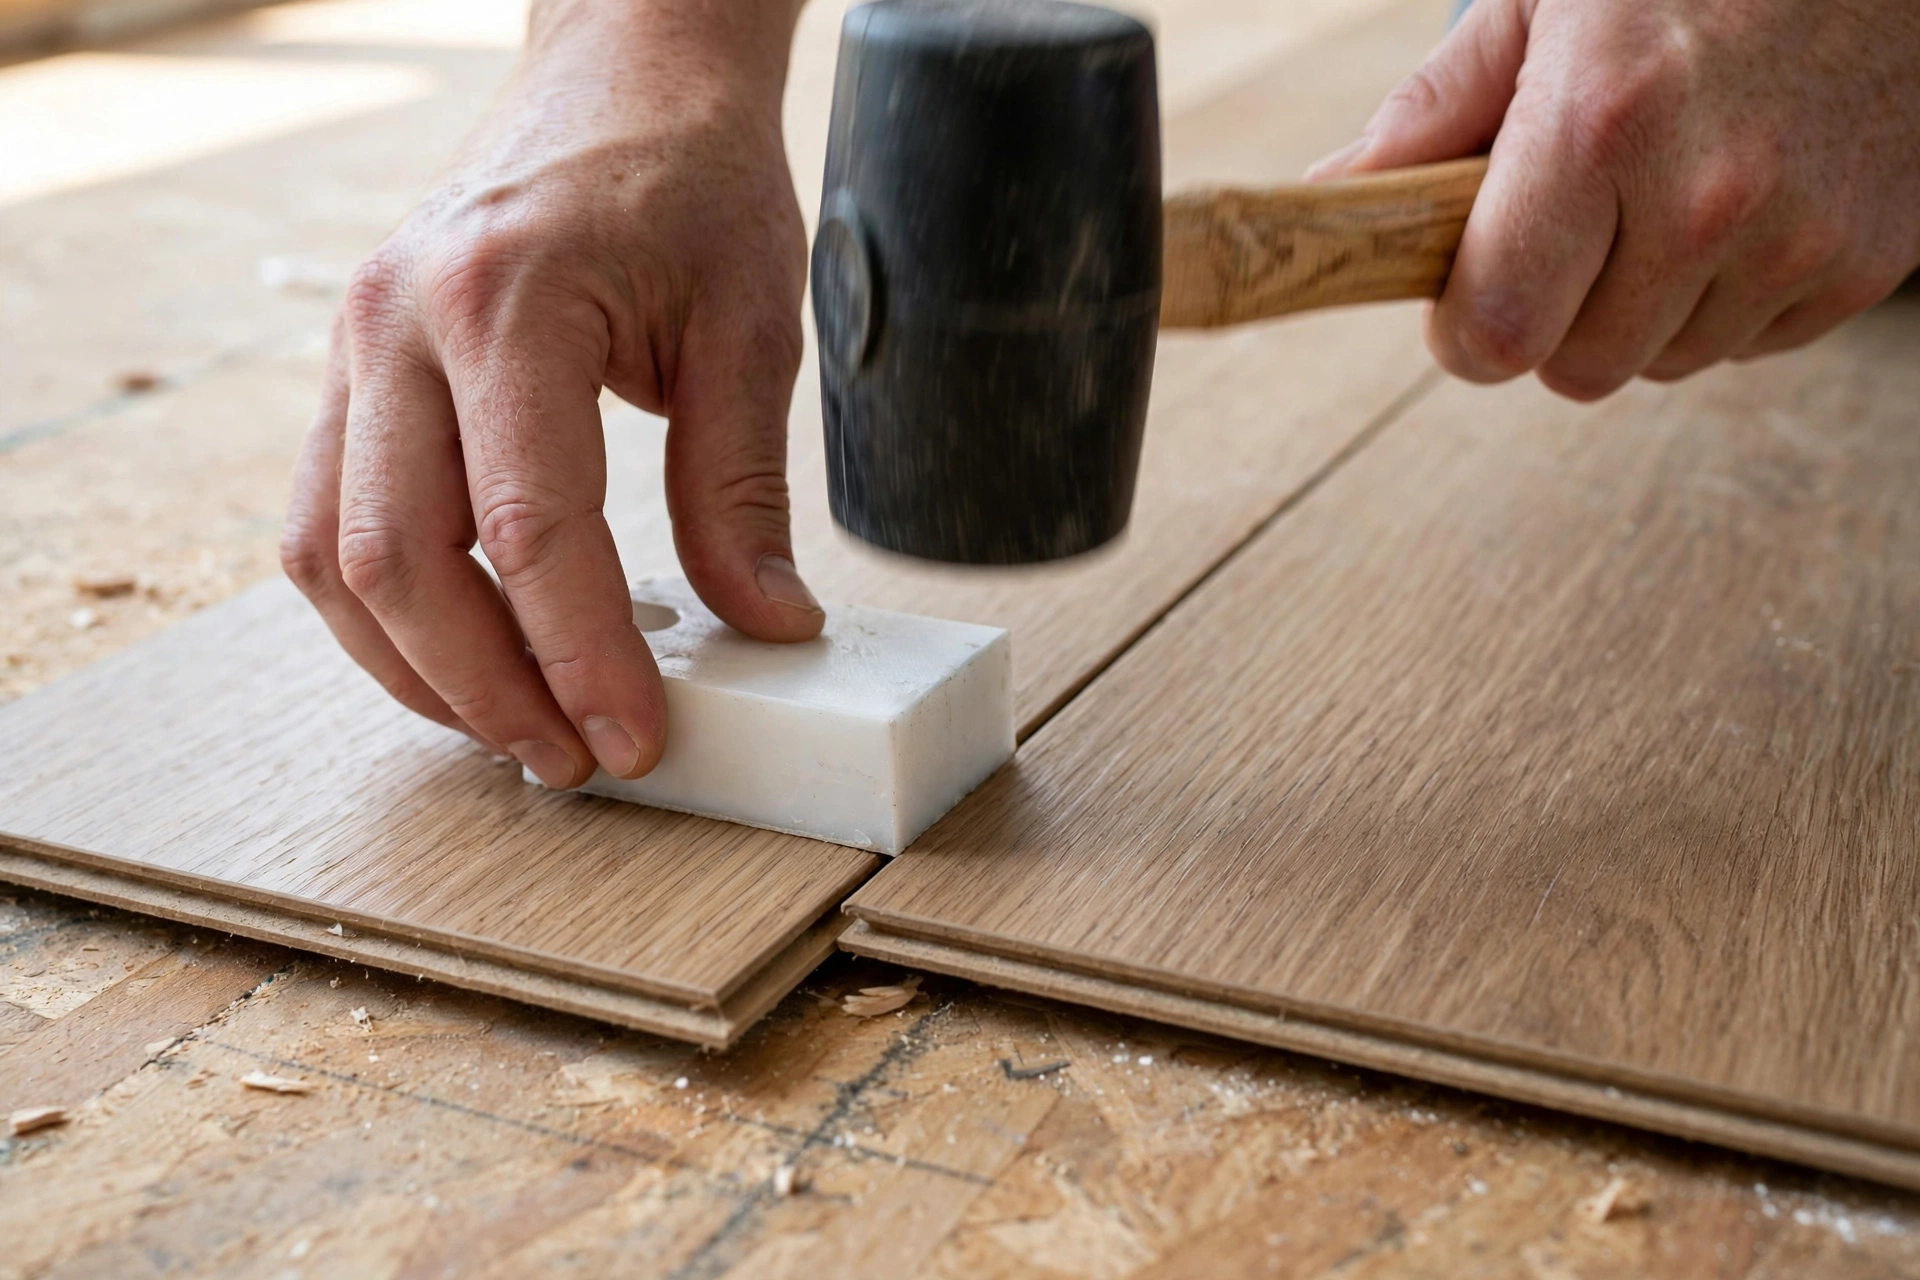
A tapping block and rubber mallet help seat the tongue-and-groove joint tightly without damaging the plank edge.
Common Mistakes to Avoid
- Starting the first row against the wrong wall, which puts the tongue side facing outward and complicates every subsequent row
- Working right to left instead of left to right, increasing the risk of chipping the delicate tongue edge as you connect planks
- Skipping the expansion gap, which can cause the floor to buckle as it naturally expands and contracts with temperature and humidity changes
- Forcing a damaged or chipped tongue into a groove, which weakens the joint and can lead to gaps appearing over time
- Cutting planks without checking which edge has the tongue, especially on the final row, which can leave you without a working locking edge where you need one
Frequently Asked Questions
Which side of laminate flooring is the tongue?
The tongue is the edge with a thin, protruding ridge, usually found along the long side of the plank (and sometimes the short side as well). You can identify it by running your finger along the edge — the tongue sticks out, while the groove is a recessed slot on the opposite side.
Does the tongue side face the wall or the room?
The tongue side typically faces the starting wall during installation, so that the groove edge of each following plank locks onto the tongue of the plank already in place.
What happens if I install laminate flooring backward?
Installing with the tongue facing the wrong direction usually means you’ll struggle to lock subsequent rows together properly, and you may need to remove and reinstall the first row once the mistake is caught.
Can the tongue break during installation?
Yes, the tongue edge is relatively thin and can chip or break if planks are forced together incorrectly or installed working in the wrong direction. Using a tapping block and mallet, rather than forcing pieces by hand, helps prevent this.
Is laminate flooring’s tongue-and-groove system the same as luxury vinyl plank’s?
The core concept is similar — both use an interlocking edge system for floating floor installation — though the exact click mechanism and edge profile can vary between laminate and luxury vinyl plank products.
Planning a laminate flooring installation? Make sure your subfloor is ready first — our guide on what a subfloor is covers what to check before laying down new flooring. Explore more flooring guides on Ayaan Home Decor.
Last modified: August 4, 2026