Maintaining a clean and hygienic home gym is crucial not only for the longevity of your equipment but, more importantly, for your health. Among all the surfaces in your workout space, your gym floor mats are arguably the most exposed to sweat, dirt, bacteria, and grime. If left uncleaned, these mats can become a breeding ground for germs, leading to skin irritations, unpleasant odors, and the general deterioration of the mat material.
Cleaning your gym floor mats doesn’t have to be a daunting task. With the right tools, knowledge, and a consistent routine, you can easily keep your home gym floor clean and safe. This comprehensive guide will walk you through the entire process, from regular maintenance to a deep, rejuvenating clean.
Understanding Your Mat Material
Before you dive in with water and soap, it’s essential to understand what your gym floor mats are made of. This knowledge will dictate the best cleaning approach and prevent you from damaging your flooring. The most common materials are:
-
Rubber: Durable, water-resistant, and commonly used in commercial and home gyms. Rubber is relatively easy to clean but can be sensitive to certain harsh chemicals and excessive soaking.
-
EVA Foam: Lightweight, cushioning, and often found in puzzle mat formats. Foam is more porous than rubber, making it crucial to avoid overwetting it, as it can trap moisture and lead to mold growth.
-
Vinyl: Often used for folding mats or as a top layer. Vinyl is generally water-resistant and easy to wipe down but can be susceptible to tears or damage from abrasive scrubbing.
1. Daily Maintenance and Dust Removal
The first line of defense against a dirty gym floor is regular maintenance. Dust, pet hair, and surface debris accumulate quickly.
-
Vacuum or Sweep: Use a vacuum with a soft brush attachment or a broom to sweep your mats after every workout. This simple step prevents abrasive particles from grinding into the surface of the mats and causing wear.
-
Wipe Down: For high-traffic areas or spots where you’ve sweated heavily, consider a quick wipe-down with a clean, dry microfiber cloth.
2. Spot Cleaning Spills and Sweat
Accidents happen. Whether it’s a spilled water bottle, sports drink, or a significant sweat puddle, immediate action prevents stains and deep-seated odors.
-
Blot immediately: If you spill liquid, grab a clean, absorbent towel and blot (don’t rub) the area to absorb as much as possible.
-
Use a specialized cleaner: Keep a spray bottle of mild gym equipment cleaner or a simple vinegar-and-water solution handy. Lightly spray the affected area and wipe it clean with a microfiber cloth.
3. Deep Cleaning: The Step-by-Step Process
A regular deep cleaning routine is essential to eliminate embedded grime, sanitize the surface, and rejuvenate your mats. For most home gyms, deep cleaning every 1-2 weeks is sufficient, depending on usage.
Here is a step-by-step guide to achieving a professional-level clean at home:
Step 1: Prepare Your Space
Ensure your home gym is well-ventilated by opening windows or turning on fans. Remove all portable equipment from the floor mats to have full access.
Step 2: Clear Loose Debris
Start by thoroughly vacuuming or sweeping the entire mat area. This ensures you aren’t just pushing dirt around when you introduce liquid.
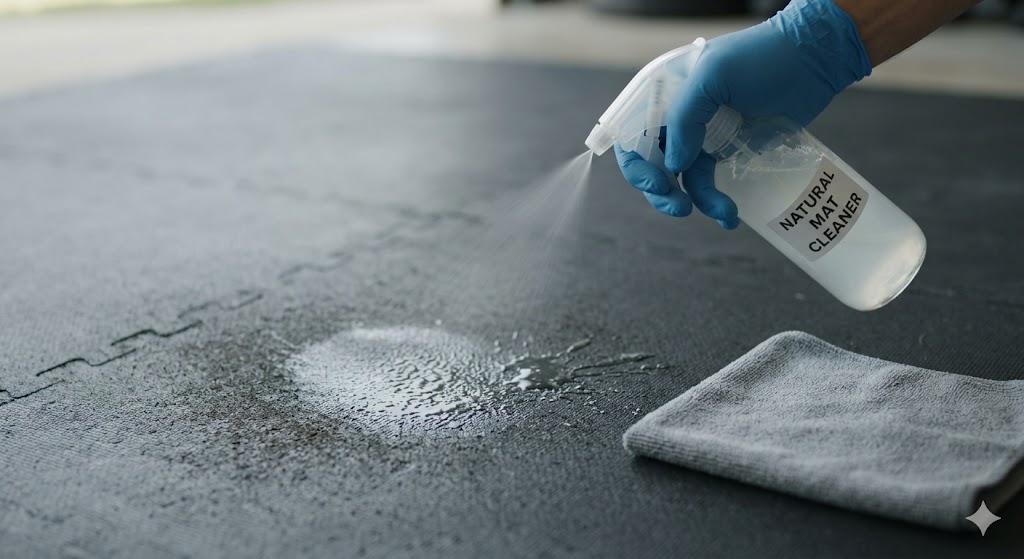
Step 3: Mix Your Cleaning Solution
Avoid harsh chemicals like bleach or ammonia, which can break down rubber and foam. Instead, opt for gentle but effective solutions:
-
Option A: Natural Solution (Recommended for all mat types): Mix one part white distilled vinegar with three parts warm water in a spray bottle. Add a few drops of your favorite essential oil (like tea tree or lavender) for natural antibacterial properties and a pleasant scent.
-
Option B: Commercial Gym Mat Cleaner: Use a specialized gym mat cleaner, following the manufacturer’s dilution instructions carefully.
![]()
Step 4: Mop or Scrub the Surface
-
Use a microfiber mop: A damp (not soaking wet) microfiber spin mop is ideal. Working in sections, lightly spray your cleaning solution onto the mat, then mop using overlapping strokes. The microfiber pads are excellent at trapping dirt.
-
For stubborn stains: Use a soft-bristled brush to gently scrub areas that need extra attention.

Step 5: The Rinse Cycle (Crucial Step)
Even “no-rinse” solutions can leave a sticky residue that attracts more dirt. This step is critical for a truly clean finish. Fill your mop bucket with clean, warm water (no soap). Thoroughly wring out your mop and go over the entire floor area to lift any remaining detergent or residue.
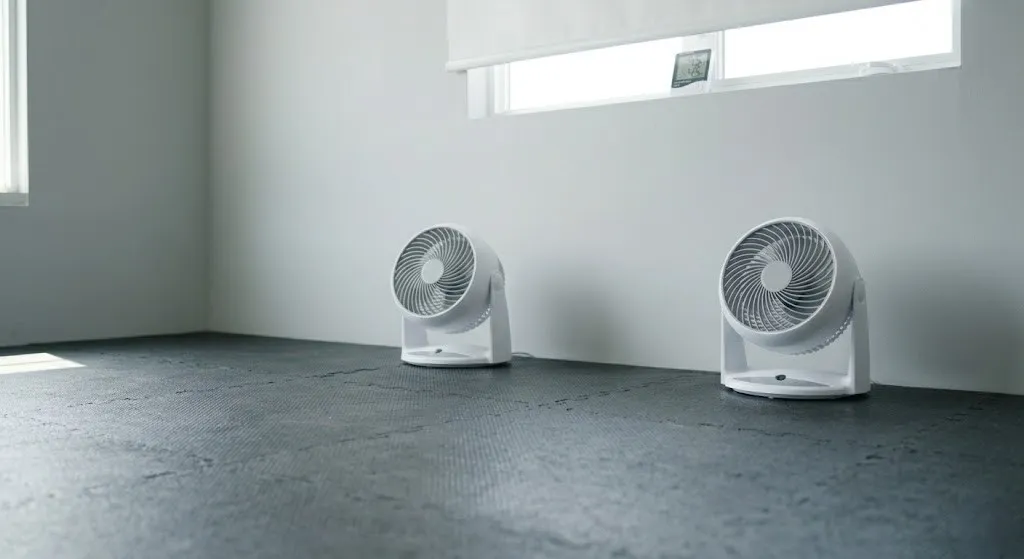
Step 6: Proper Drying
Allowing your mats to air dry completely is non-negotiable. Walking on or replacing equipment on wet mats can trap moisture, causing mold, mildew, and foul odors.
-
Ventilation is key: Keep windows open and fans running to accelerate drying.
-
Sunlight (with caution): For modular foam or rubber tiles, a brief period in direct sunlight can help disinfect, but prolonged exposure can cause cracking or fading, especially for foam.
Summary Infographic: Your 3-Step Routine
Post-Cleaning and Storage Tips
-
Inspect for Damage: While cleaning, take a moment to look for signs of wear, tears, or separation in puzzle mats.
-
Re-installing Mats: Once completely dry, re-assemble any modular mats and carefully move your equipment back into place.
-
Consider Mat Protectors: Under very heavy cardio equipment or weight racks, consider using equipment mats to protect your main flooring.
By following these simple steps and maintaining a consistent cleaning routine, you ensure your home gym remains a clean, safe, and motivating environment for your fitness journey. A little maintenance goes a long way in protecting your investment and your health.
Last modified: April 2, 2026